Welcome to our blogpost about the Total.js UI Builder series! In the previous post, we explored using basic components to create interactive elements. This time, we’ll guide you step-by-step through building a Create Account Form, complete with input fields, a dropdown menu, and JSON output functionality.
By the end of this guide, you'll:
- Understand how to use form-related components effectively.
- Learn how to structure data in the form and process the output in JSON format.
- Gain hands-on experience with the Total.js UI Builder interface.
Don’t worry if this is your first time working with Total.js UI Builder; we’ll explain every step in detail and include placeholders for screenshots. Let's dive in!
Step 1: Open Total.js UI Builder
First, open the Total.js UI Builder.
- Click Create New Project.
- Name your project Create Account Form.
- Select Web App as the template and proceed.
- The editor will load, and you’ll see the Canvas, Components Sidebar, and other tools.
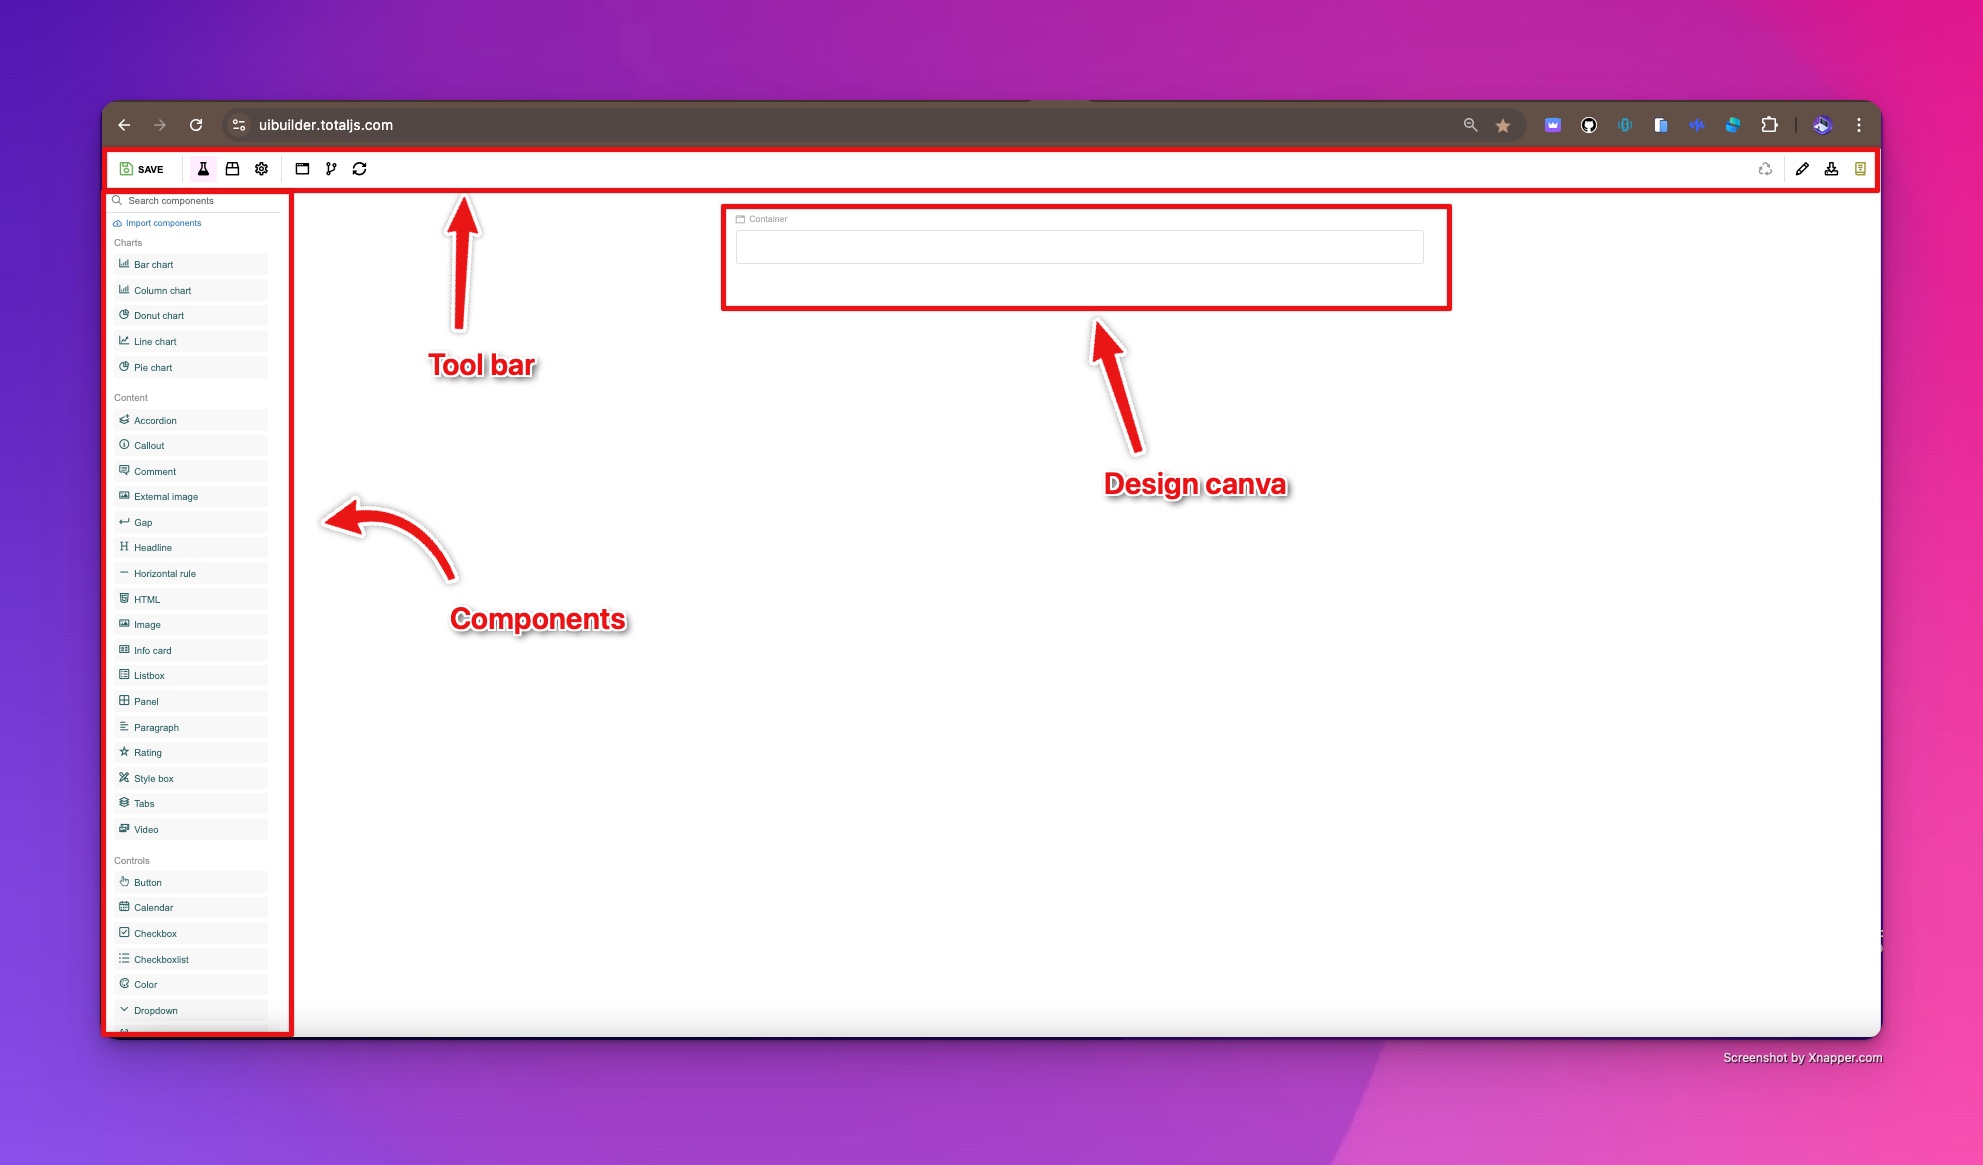
The UI Builder interface after creating a new project.
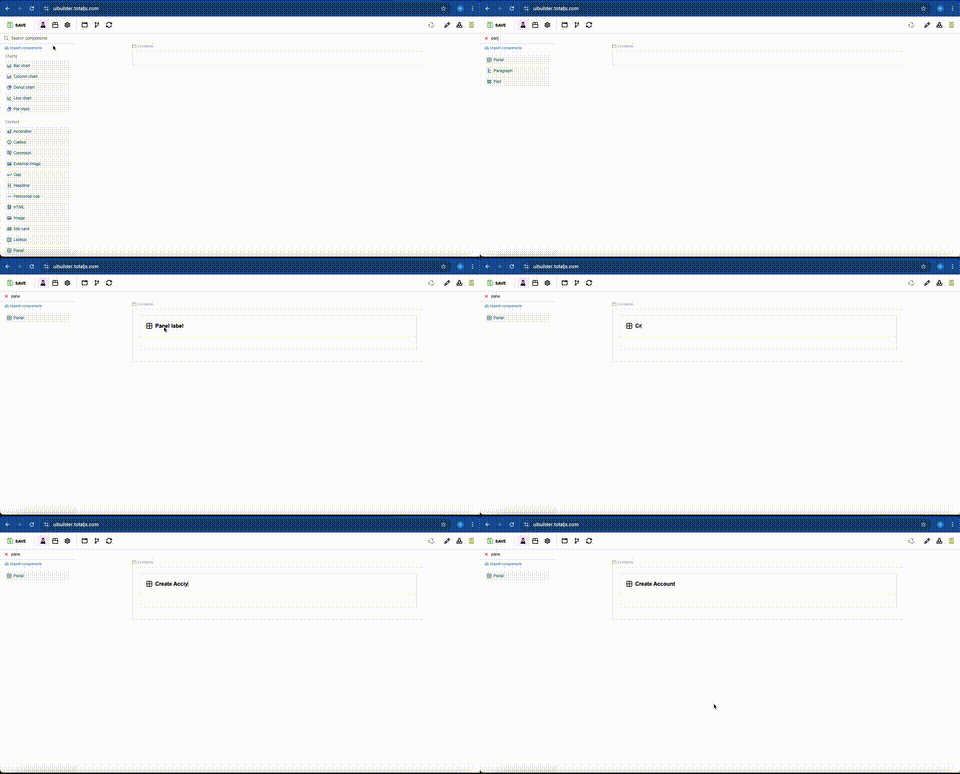
1. Add a Panel
- Search for the Panel component using the search bar on the left.
- Drag and drop it onto the Canvas.
- Double-click the default title (My Title) to edit it, and change it to Create Account.
- This Panel will act as a container for all the components of our form.
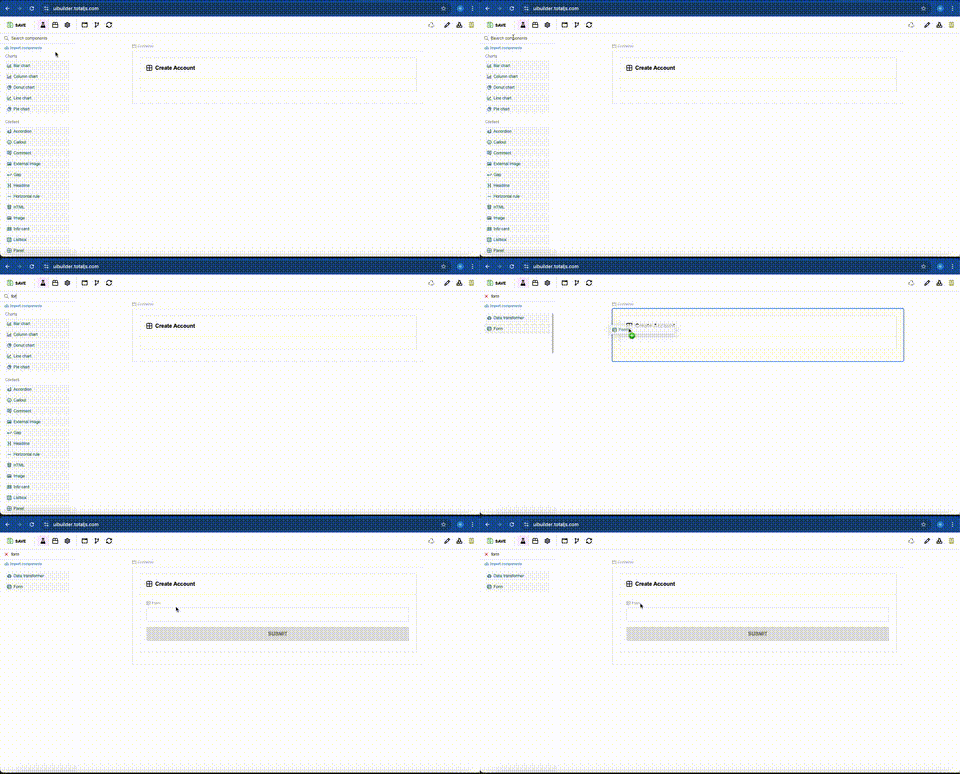
- Search for the Form component and drag it inside the Panel.
- Right-click the Form, choose Settings, and review the options. Leave the default settings for now.
- The Form component will hold all the input fields and handle data submission.
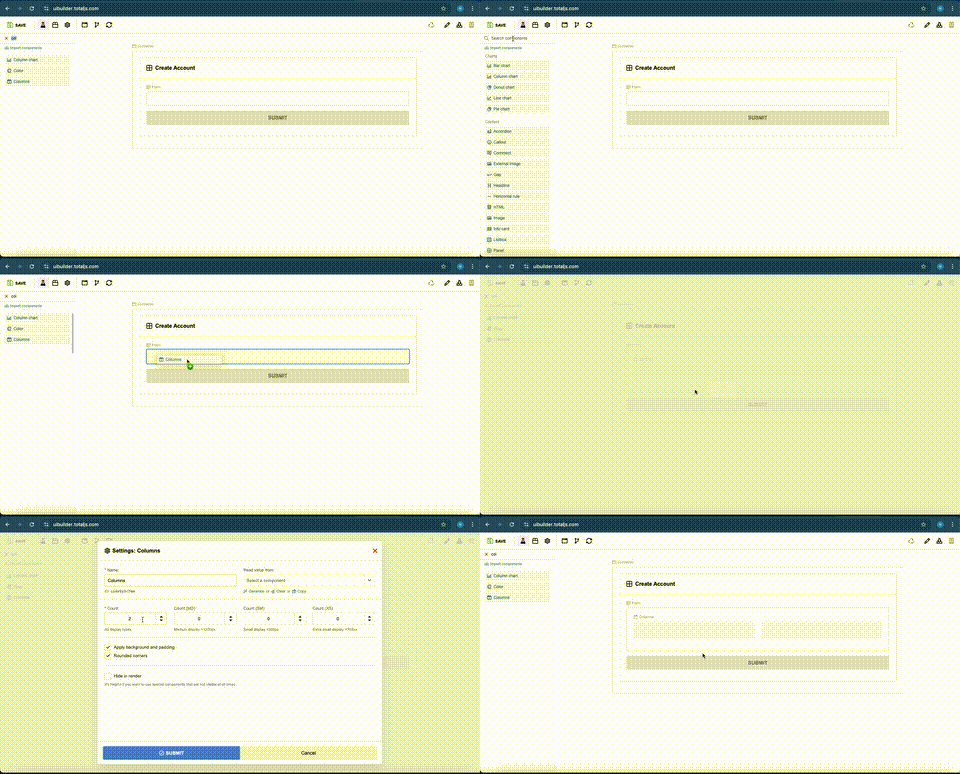
3. Add Columns for Layout
- Search for the Columns component and drop it inside the Form.
- The Columns component helps organize input fields in a structured layout.
- Right-click the Columns component, open Settings, and change the Number of Columns to 2 (the default is 3).
This layout ensures that inputs are neatly arranged side-by-side.
4. Add Textboxes for Input Fields
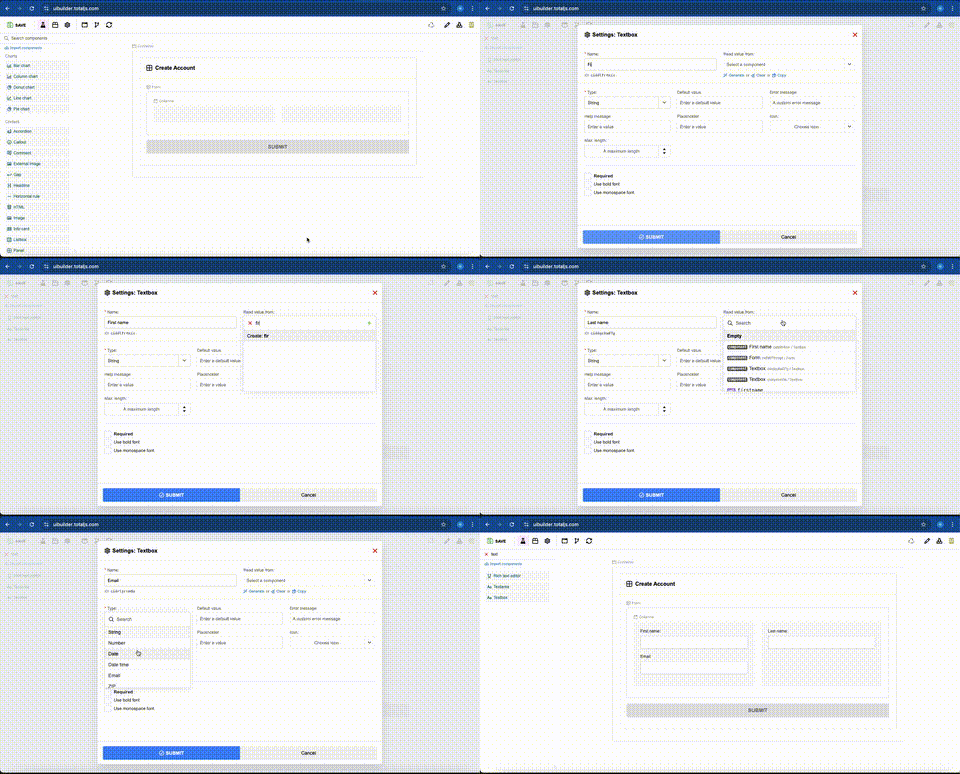
Now, let’s create three text fields for Firstname, Lastname, and Email.
- Search for the Textbox component and drag it into the first column.
- Clone the Textbox two more times to create three fields. (You can clone components by right-clicking and selecting Clone.)
For each field:
- Right-click the Textbox, choose Settings, and edit the Display Name and Path as follows:
- Firstname →
firstname
- Lastname →
lastname
- Email →
email (also set the Type to Email).
- The Path is important as it maps the data entered in the field to JSON output.
5. Add a Dropdown for Gender
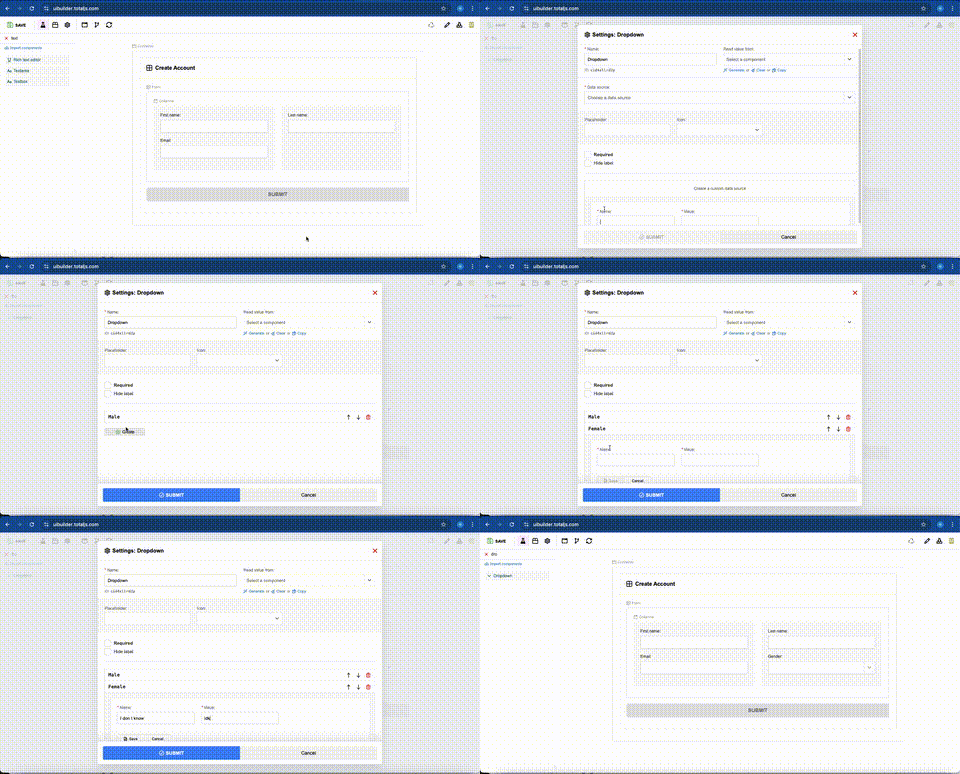
- Search for the Dropdown component and drop it below the text fields.
- Right-click the Dropdown, open Settings, and configure a custom data source as follows:
- Add options:
Male, Female, Other.
This Dropdown will allow the user to select their gender.
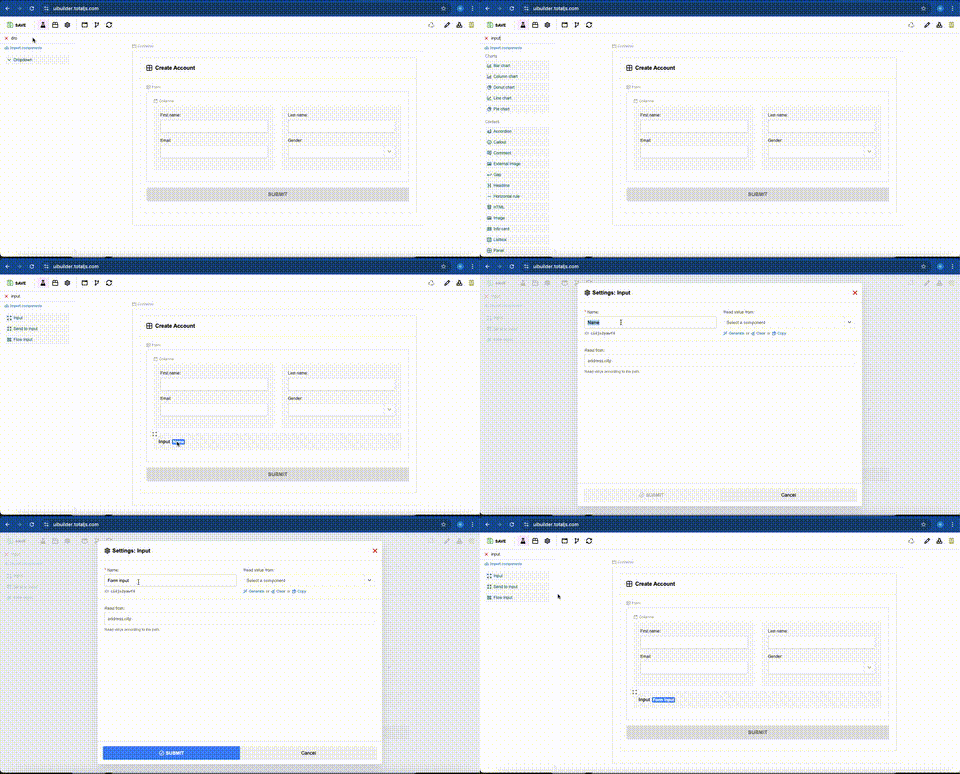
- Search for the Input component and drop it onto the Canvas.
- This Input will process and store the form data when the form is submitted.
Refer to the previous blog post if you need a refresher on setting up the Input component.
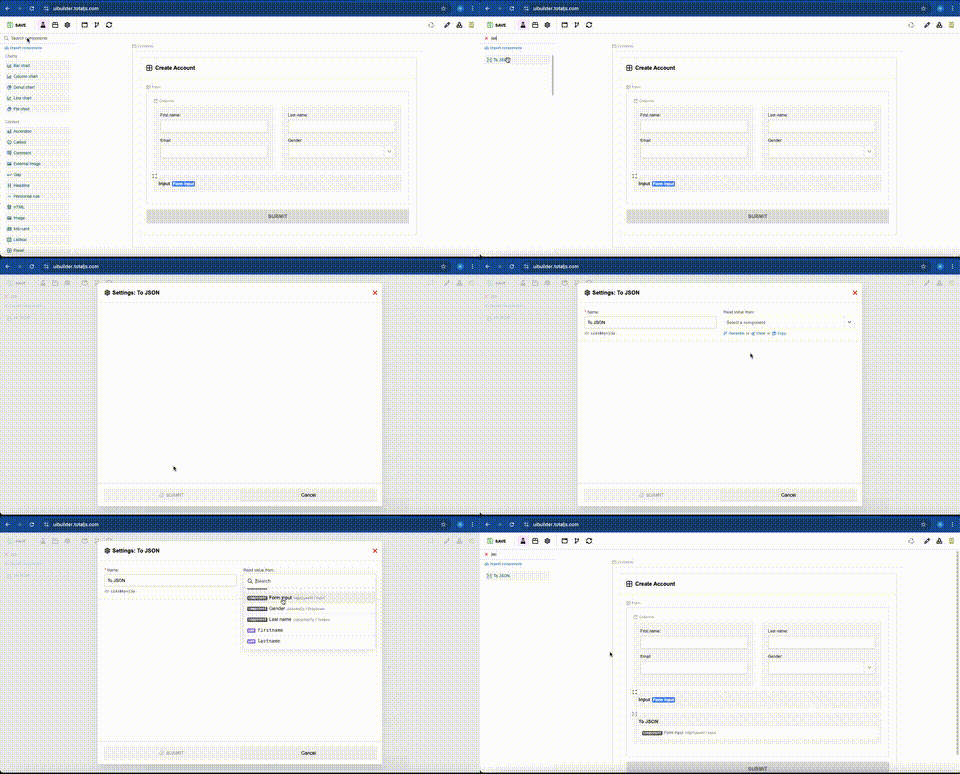
7. Add a To JSON Component
- Search for the To JSON component and add it to the Canvas.
- Right-click the To JSON component, open Settings, and select the Input component as the data source.
- This will enable you to display the form data in JSON format.
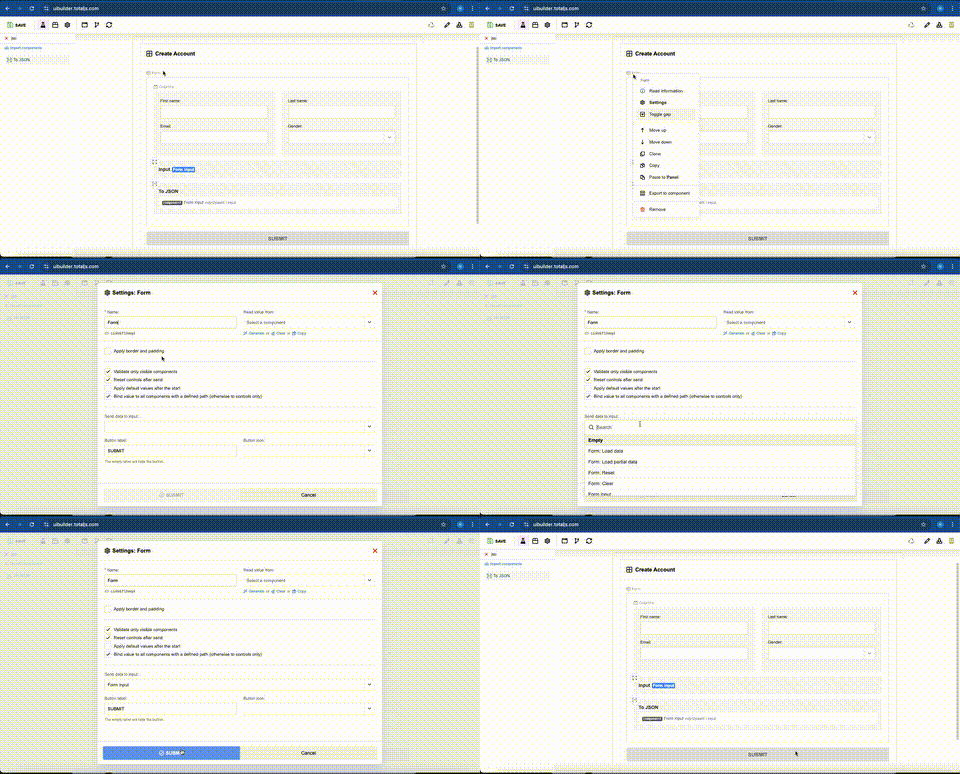
- Finally, configure the Form to send its data to the Input component:
- Right-click the Form, choose Settings, and locate the Send the data of form to field.
- Select the Input component.
This ensures that when the form is submitted, its data flows to the Input for processing.
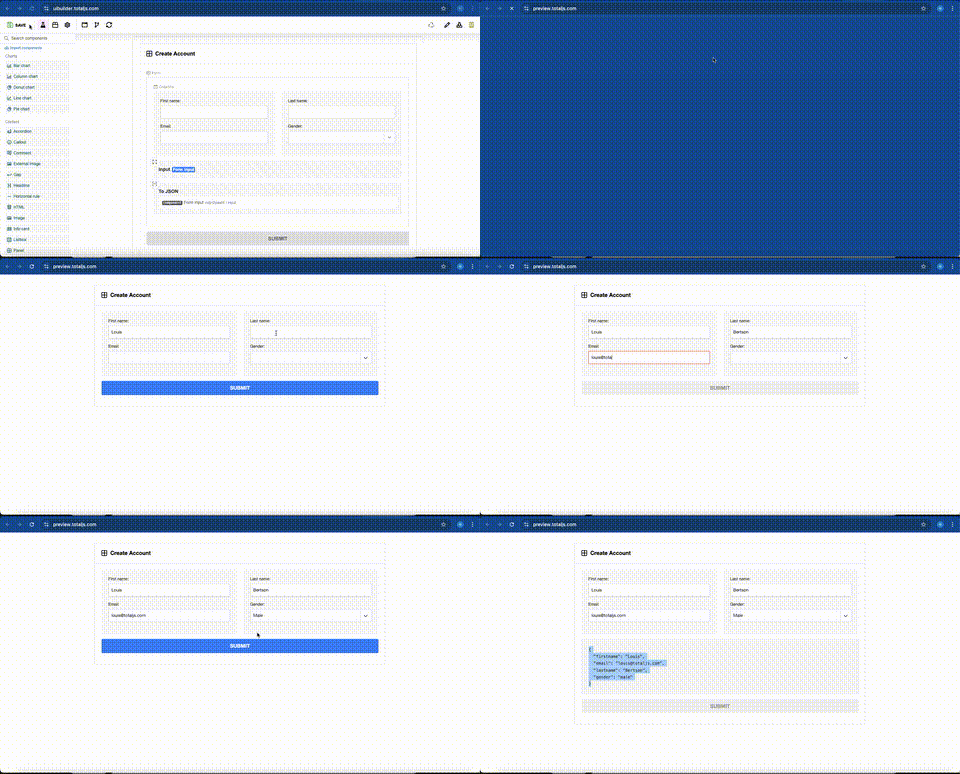
Now that the form is complete, let’s test it:
- Click the Preview button in the toolbar (top-right).
- The form will open in a new tab.
- Fill out the fields (Firstname, Lastname, Email, and Gender).
- Click Submit to send the data.
- You’ll see the JSON output displayed on the page.
Step 4: Experiment with Customizations
Here are a few ideas to extend your form:
- Add validation rules for inputs (e.g., make Email mandatory).
- Include additional fields like Password, Phone Number, or Address.
- Style the form by customizing the Panel and Columns settings.
Conclusion
Congratulations! You’ve built a Create Account Form using Total.js UI Builder, learned how to structure inputs, and processed form data into JSON. This foundational skill will be crucial as you build more complex interfaces.
Stay tuned for our next tutorial, where we’ll explore dynamic form validation and advanced data processing. Got questions or ideas? Join the conversation in the Total.js Telegram group!
