Localization: A Comparative Analysis of Express.js, PHP Laravel and Total.js
When it comes to localization in web applications, the ability to support multiple languages and adapt to regional preferences is crucial. Let's compare Express.js, PHP Laravel, and Total.js in terms of their localization capabilities:
Overview

Disclaimer:
This blog post provides a general overview of the frameworks and their characteristics, but it is important to conduct thorough research and analysis before making any decisions regarding the selection of a framework for your specific project. The opinions expressed in this blog post are those of the author and should not be considered as professional advice or the sole basis for making decisions. It is recommended to consult with experts and refer to the official documentation and community forums of each framework for the most up-to-date and accurate information.
Express.js:
Express.js is a minimalist web application framework for Node.js. While it does not provide built-in localization features, it offers a flexible environment to implement localization in your application. Express.js can be combined with various libraries and tools to achieve localization functionality, such as i18n, i18next, or custom middleware.
Pros:
- Flexibility to choose from multiple localization libraries.
- Allows customization and implementation based on specific project requirements.
- Integrates well with other Node.js libraries and tools.
Cons:
- Requires additional configuration and setup for localization.
- Lack of built-in localization features increases development effort.
- Reliance on external libraries may introduce compatibility or maintenance challenges.
Example
Let's assume you have an Express.js application for a user CRUD (Create, Read, Update, Delete) app, and you want to demonstrate localization for the views. Here's an example of how you can implement localization in Express.js:
1. Install the necessary dependencies:
2. Create a folder called "locales" in the root directory of your project.
Inside the "locales" folder, create language-specific JSON files for each supported language. For example, create en.json for English and fr.json for French. These files will contain key-value pairs for translated strings.
en.json:
   {
     "welcome": "Welcome to the User CRUD App!",
     "create": "Create User",
     "read": "Read User",
     "update": "Update User",
     "delete": "Delete User"
   }
fr.json:
   {
     "welcome": "Bienvenue dans l'application CRUD utilisateur !",
     "create": "Créer un utilisateur",
     "read": "Lire un utilisateur",
     "update": "Mettre à jour un utilisateur",
     "delete": "Supprimer un utilisateur"
   }
3. Set up Express.js and localization middleware in your app.js or main application file:
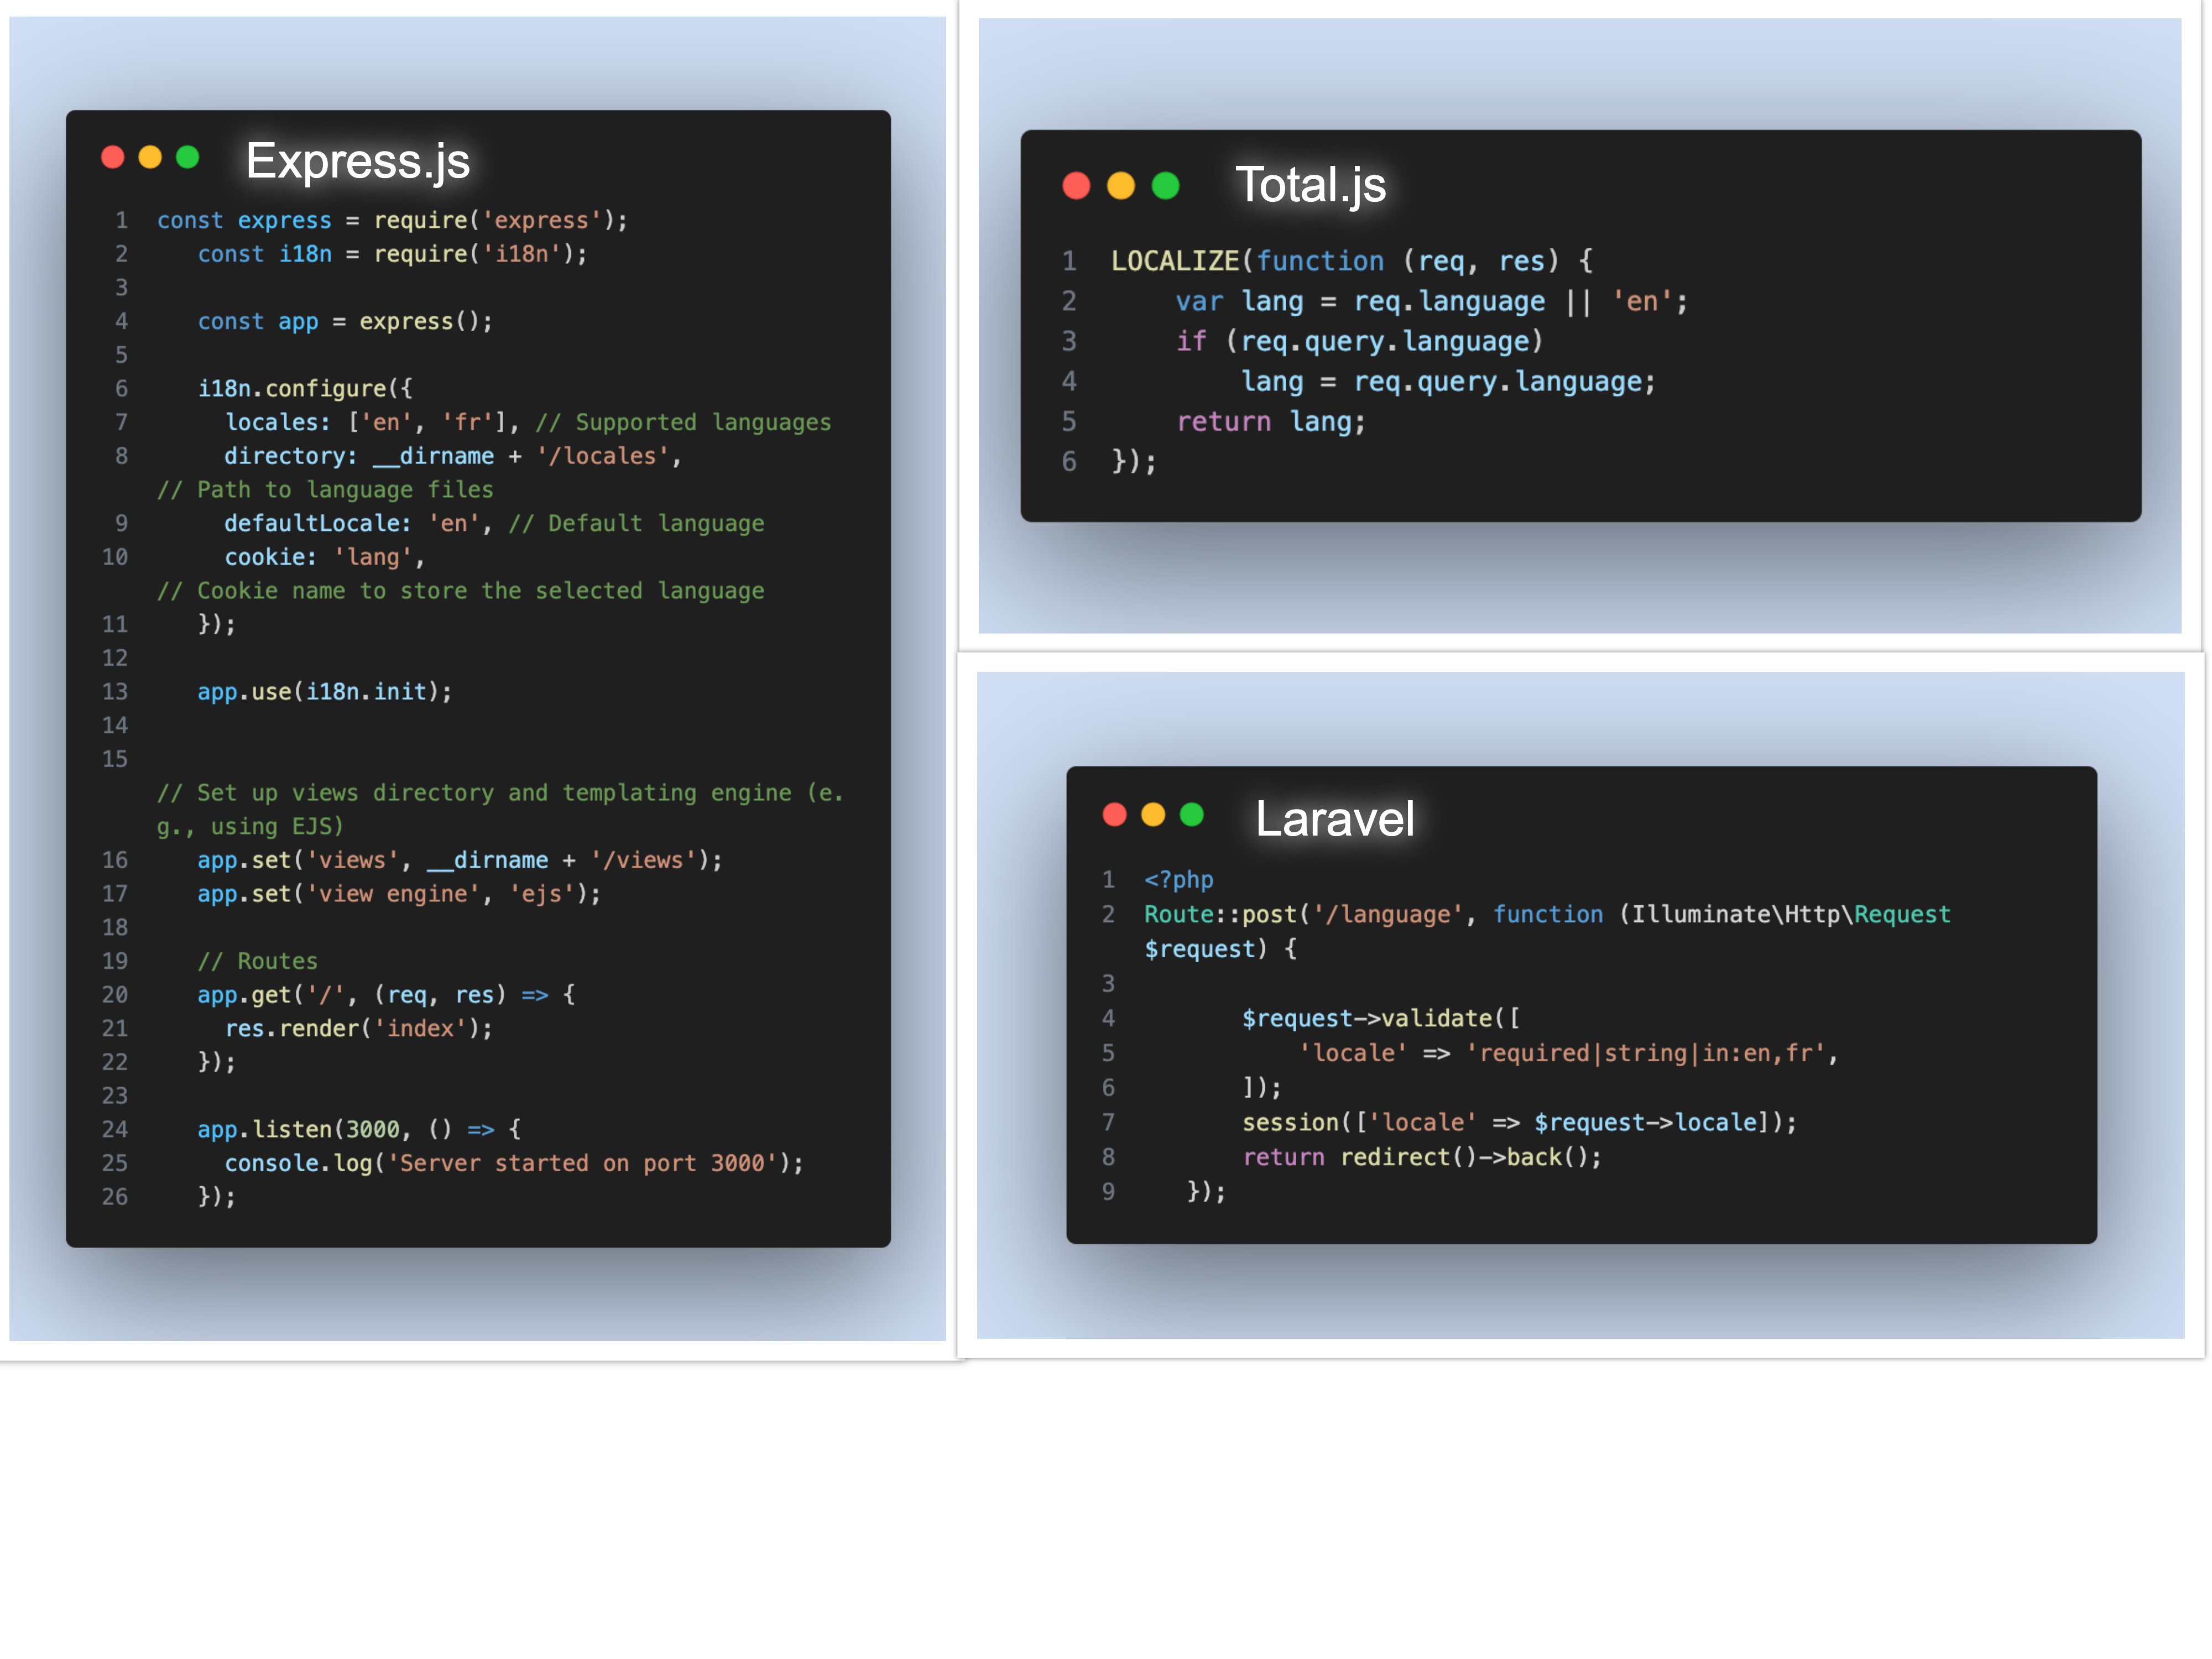
   const express = require('express');
   const i18n = require('i18n');

   const app = express();

   // Localization middleware
   i18n.configure({
     locales: ['en', 'fr'], // Supported languages
     directory: __dirname + '/locales', // Path to language files
     defaultLocale: 'en', // Default language
     cookie: 'lang', // Cookie name to store the selected language
   });

   app.use(i18n.init);

   // Set up views directory and templating engine (e.g., using EJS)
   app.set('views', __dirname + '/views');
   app.set('view engine', 'ejs');

   // Routes
   app.get('/', (req, res) => {
     res.render('index');
   });

   app.listen(3000, () => {
     console.log('Server started on port 3000');
   });
4. Create an index.ejs file inside the "views" folder with the following content:
   <!DOCTYPE html>
   <html lang="<%= res.locale %>">
   <head>
     <meta charset="UTF-8">
     <title>User CRUD App</title>
   </head>
   <body>
     <h1><%= res.__('welcome') %></h1>
     <ul>
       <li><a href="/create"><%= res.__('create') %></a></li>
       <li><a href="/read"><%= res.__('read') %></a></li>
       <li><a href="/update"><%= res.__('update') %></a></li>
       <li><a href="/delete"><%= res.__('delete') %></a></li>
     </ul>
   </body>
   </html>
5. Start your Express.js server:
Now, when you access http://localhost:3000 in your browser, the view will display the localized strings based on the selected language. You can switch between languages by setting the lang cookie with the desired language code ('en' for English or 'fr' for French).
This example demonstrates a basic implementation of localization in an Express.js view for a user CRUD app. You can extend this approach to other views and routes in your application and add more language files to support additional languages.
PHP Laravel:
Laravel is a popular PHP framework that offers comprehensive localization support out of the box. It provides features like translation files, localization helpers, and automatic language detection. Laravel's localization capabilities are based on the industry-standard Gettext framework and provide a smooth and efficient way to handle translations.
Pros:
- Built-in localization support with translation files and language files.
- Provides translation helpers and convenient localization functions.
- Automatic language detection based on user preferences or browser settings.
Cons:
- Requires familiarity with Laravel's localization syntax and conventions.
- Limited to PHP-based applications.
- Requires a server with PHP support.
Example
Here's an example of how you can implement localization in Laravel for a user CRUD app:
1. Set up Laravel localization:
Open the config/app.php file and ensure that the locale parameter is set to the default language you want to use. For example:
2. Create language files:
Laravel uses language files to store translations. Inside the resources/lang directory, create a folder for each language you want to support (e.g., en for English and fr for French). Inside each language folder, create a file called messages.php.
resources/lang/en/messages.php:
   <?php

   return [
       'welcome' => 'Welcome to the User CRUD App!',
       'create' => 'Create User',
       'read' => 'Read User',
       'update' => 'Update User',
       'delete' => 'Delete User',
   ];
resources/lang/fr/messages.php:
   <?php

   return [
       'welcome' => 'Bienvenue dans l\'application CRUD utilisateur !',
       'create' => 'Créer un utilisateur',
       'read' => 'Lire un utilisateur',
       'update' => 'Mettre à jour un utilisateur',
       'delete' => 'Supprimer un utilisateur',
   ];
3. Use localization in the view:
Open your user CRUD view file (e.g., resources/views/users/index.blade.php) and use the trans() helper function to display the translated strings.
   <!DOCTYPE html>
   <html lang="{{ app()->getLocale() }}">
   <head>
       <meta charset="UTF-8">
       <title>User CRUD App</title>
   </head>
   <body>
       <h1>{{ trans('messages.welcome') }}</h1>
       <ul>
           <li><a href="/create">{{ trans('messages.create') }}</a></li>
           <li><a href="/read">{{ trans('messages.read') }}</a></li>
           <li><a href="/update">{{ trans('messages.update') }}</a></li>
           <li><a href="/delete">{{ trans('messages.delete') }}</a></li>
       </ul>
   </body>
   </html>
4. Update the language dynamically:
To allow users to switch languages, you can add language selection links or a dropdown menu to your view. For example, you can create a language selector dropdown menu that sends a POST request to a route like /language to update the language:
   <form action="/language" method="POST">
       @csrf
       <select name="locale" onchange="this.form.submit()">
           <option value="en" {{ app()->getLocale() === 'en' ? 'selected' : '' }}>English</option>
           <option value="fr" {{ app()->getLocale() === 'fr' ? 'selected' : '' }}>French</option>
       </select>
   </form>
5. Add a route to handle language switching:
In your web.php routes file, add a route to handle the language switching request:
   Route::post('/language', function (Illuminate\Http\Request $request) {
       $request->validate([
           'locale' => 'required|string|in:en,fr',
       ]);

       session(['locale' => $request->locale]);

       return redirect()->back();
   });
6. Start your Laravel development server:
Run the following command in your project directory:
Now, when you access your user CRUD app view, the strings will be displayed in the selected language. By changing the language selection, the view will update accordingly.
This example demonstrates a basic implementation of localization in Laravel for a user CRUD app view. You can expand on this by applying localization to other views, adding more languages, and using more advanced features provided by Laravel's localization system.
Total.js:
Total.js is a full-stack JavaScript framework that can be used for web application development specialy real-time or/and microservices based applications. When it comes to localization, it also has native localization features like Laravel but more advanced and extremely fast. Here are some advantages about the Total.js localization mechanism.
- Great and genius localization mechanism.
- No-dependency
- You can generate-localization dictionary directly from source-code
- Offers flexibility for generating and updating translation dictionnary via cammand line interface.
- The framework localizes views and .html static files at compile time, so it is fast at rendering
- Each translated view is stored in memory
- Localization is applied to all static
.html files and views
- Text for translation is wrapped in
@(Text to translate) markup
Initialization
To initialize localization, you need to register a localization delegate that obtains language from the request.
/definitions/localization.js:
LOCALIZE(function(req, res) {
    // if "query.language" will be undefined then the framework uses default resource
    return req.query.language;
});
- also language can be change in the
controller.language = 'en'
Language resource files (Dictionaries)
First, install Total.js as a global module via $ npm install -g total4 because NPM registers Total.js command-line tools and terminal helpers.
- Creating of resource file
Open terminal and write:
$ cd myapp
$ total4 --translate
// Total.js translation file
// Created: 2020-12-04 10:32

// index.html
T1c4854        : Title
T1y5ksfx       : Hello world!
Tpfol3         : Total.js is web application framework for Node.js

// IMPORTANT: This line was created manually
message        : Direct reading
Total.js finds all texts for translation and creates a resource file translate.resource for translation. The keys in the resource file are hashes due to performance and memory consumption. Copy the file: /resources/fr.resource and translate it to e.g.:
// Total.js translation file
// Created: 2020-12-04 10:32

// index.html
T1c4854        : Titre
T1y5ksfx       : Bonjour tout le monde!
Tpfol3         : Total.js est un framework web pour Node.js

// IMPORTANT: This line was created manually
message        : Lecture direct
Localization in views
@{meta('@(Title)')}

<h1>@(Hello world!)</h1>
<p>@(Total.js is web application framework for Node.js)</p>

<!-- READS THE TITLE DIRECTLY FROM THE RESOURCE FILE -->
<!-- YOU CAN USE OWN CUSTOM KEY -->
<div>@(#message) or @(#T1c4854) is same as @(Title) (read below)</div>
Usage
Run the app $ node index.js and visit:
http://127.0.0.1:8000/:
...
...
    <title>Title</title>
...
...
    <h1>Hello world!</h1>
    <p>Total.js is web application framework for Node.js</p>
    <div>Direct reading or Title is same as Title (read below)</div>
...
...
http://127.0.0.1:8000/?language=fr:
...
...
    <title>Titre</title>
...
...
    <h1>Bonjour tout le monde</h1>
    <p>Total.js je webový framework pre Node.js</p>
    <div>La lecture directe est la meme que le Titre</div>
...
...
Example
Create app
Let us create project and install Total.js
mkdir users-crud && cd users-crud
npm init -y
npm install total4
// /index.js
require('total4/debug')({ port: 5000 });
Initialize localization handler
The localization can be declared in definition file
// /definitions/localization.js
// via LOCALIZE(fn);
LOCALIZE(function (req, res) {
    var lang = 'en'; // default

    // From connected user session
    // if (req.user)
    //     lang = req.user.language

    // From query params
    if (req.query.language)
        lang = req.query.language


    return lang;
});
Create endpoints in controller
// /controllers/default.js

exports.install = function() {
    ROUTE('GET /', home);
};

function home() {
    var self = this;

    self.view('index');
}
Create views
    @{layout('')}
    <!DOCTYPE html>
           <html lang="@{controller.language}">
       <head>
           <meta charset="UTF-8">
           <title>@(Title)</title>
       </head>
       <body>
           <h1>@(Welcome to the users page)</h1>
           <ul>
               <li><a href="/create">@(Create)</a></li>
               <li><a href="/read">@(Read)</a></li>
               <li><a href="/update">@(Update)</a></li>
               <li><a href="/delete">@(Delete)</a></li>
           </ul>
       </body>
   </html>
Generate localisation files
Don't forget to first install Total.js as a global module $ npm install -g total4 because NPM registers Total.js terminal / command-line helpers.
Creating of resource file
Open terminal and write:
$ cd users-crud
$ total4 --translate
Output will be:
// /transalate.resource
// Total.js translation file
// Created: 2023-07-06 02:08

// views/index.html
T1c4854        : Title
T10fad25       : Welcome to the users page
Txijsik        : Create
T1ii7q         : Read
T1608rft       : Update
Txskn2j        : Delete
The content of that /translate.resource can be translated into any language you want.
Just copy /translate.resource file into /resources/ folder.
Example for French language:
Copy /translate.resource to /resources/fr.resource and make necessary translations.
// Total.js translation file
// Created: 2023-07-05 05:02

// views/index.html
T1c4854        : Titre
T10fad25       : Bienvenu a la page des utilisateurs
Txijsik        : Creer
T1ii7q         : Afficher
T1608rft       : Modifier
Txskn2j        : Supprimer
In summary, while Express.js provides flexibility for implementing localization using various libraries, Laravel stands out with its comprehensive built-in localization support. Total.js clearly has the most advanced, complete and fast localization mechanism as it can even support writing translation string anywhere in sources code, this way, even Rest APIs, errors outputs can be localized without any problem. But alfter all, consider your project's specific requirements, development stack, and the level of localization support you need when choosing a framework for your localization needs.

